

Hey there! I'm a supplier of Anti Corrosion Polyurea, and today I want to share some insights on how to repair damaged anti corrosion polyurea coating. Polyurea coatings are amazing for their durability and resistance to corrosion, but like any other material, they can get damaged over time. Whether it's due to wear and tear, physical impact, or environmental factors, knowing how to repair the coating is crucial to maintain its effectiveness.
Understanding the Damage
The first step in repairing a damaged anti corrosion polyurea coating is to understand the type and extent of the damage. Minor scratches and abrasions are common and can usually be fixed relatively easily. These surface-level damages might not compromise the coating's anti - corrosion properties immediately but can lead to further issues if left untreated. On the other hand, deep cuts, cracks, or areas where the coating has peeled off completely are more serious and require more attention.
Inspect the damaged area carefully. Look for signs of rust or corrosion beneath the coating. If there's rust, it means the damage has penetrated deep enough to expose the substrate to the elements. In such cases, the rust needs to be removed before proceeding with the repair.
Gathering the Necessary Tools and Materials
Once you've assessed the damage, it's time to gather the tools and materials you'll need for the repair. Here's a list of what you might need:
- Cleaning Supplies: You'll need a good degreaser and a pressure washer or a scrub brush to clean the damaged area thoroughly. This will remove any dirt, oil, or debris that could interfere with the repair process.
- Sandpaper or Abrasive Pads: For sanding the damaged area and the surrounding coating. This helps to create a rough surface for better adhesion of the new polyurea.
- Polyurea Coating: Make sure to use the same type of Anti Corrosion Polyurea as the original coating. If you're not sure, you can always contact me, and I'll help you choose the right one.
- Mixing Equipment: Depending on the type of polyurea you're using, you might need a mixer to combine the components properly.
- Application Tools: Such as spray guns, rollers, or brushes. The choice of tool depends on the size and nature of the damaged area.
Preparing the Damaged Area
Before applying the new polyurea, the damaged area needs to be properly prepared. Start by cleaning the area using the degreaser and a scrub brush or a pressure washer. Make sure to remove all dirt, oil, and loose particles. If there's rust, use a wire brush or a sandblaster to remove it completely. Once the rust is gone, clean the area again to remove any residue.
Next, sand the damaged area and the surrounding coating. Use a medium - grit sandpaper or an abrasive pad to create a rough surface. This will help the new polyurea bond better with the existing coating. After sanding, clean the area again to remove any dust.
Mixing the Polyurea
If you're using a two - component polyurea, it's important to mix the components correctly. Follow the manufacturer's instructions carefully. Usually, you'll need to mix the resin and the hardener in the right ratio. Use a mixer to ensure a thorough and uniform mixture.
Applying the New Polyurea
Now it's time to apply the new polyurea. If the damaged area is small, you can use a brush or a roller. For larger areas, a spray gun is more efficient. Make sure to apply the polyurea evenly, following the manufacturer's recommended application thickness.
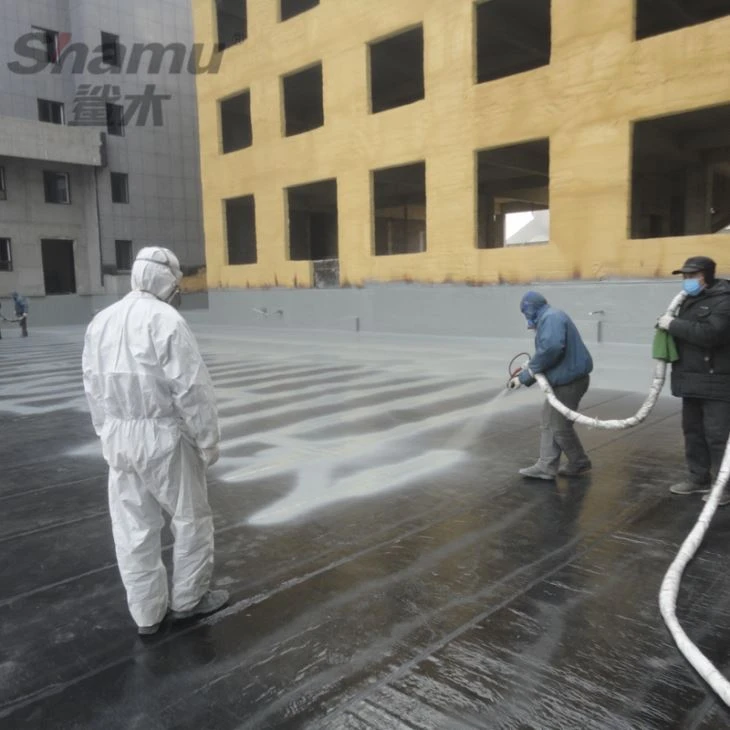

Start from the edges of the damaged area and work your way towards the center. Overlap the new polyurea with the existing coating slightly to ensure a seamless repair. If you're using a spray gun, keep the gun at a consistent distance from the surface and move it in a smooth, even motion.
Curing and Finishing
After applying the new polyurea, it needs to cure properly. The curing time depends on the type of polyurea and the environmental conditions. Generally, it takes a few hours to a few days for the polyurea to fully cure.
During the curing process, make sure to keep the area clean and dry. Avoid any physical contact with the newly applied coating until it's fully cured. Once the polyurea is cured, you can inspect the repair. If necessary, you can sand the area lightly to smooth out any rough edges and give it a more professional finish.
Special Considerations for Different Substrates
The repair process might vary slightly depending on the substrate. For example, if the polyurea coating is on a metal substrate, you need to be extra careful about removing rust and ensuring proper adhesion. On concrete substrates, you might need to fill any cracks or holes before applying the new polyurea.
If you're dealing with a substrate that has a complex shape or texture, it might be more challenging to apply the polyurea evenly. In such cases, you might need to use specialized application techniques or tools.
Long - Term Maintenance
Repairing the damaged anti corrosion polyurea coating is just one part of the equation. To ensure the long - term performance of the coating, regular maintenance is essential. Here are some tips for maintaining your polyurea coating:
- Regular Inspections: Check the coating periodically for signs of damage, such as scratches, cracks, or peeling. Early detection can prevent minor issues from becoming major problems.
- Cleaning: Clean the coating regularly to remove dirt, debris, and any chemicals that could damage the polyurea. Use a mild detergent and a soft brush or a pressure washer.
- Avoid Harsh Chemicals: Some chemicals can damage the polyurea coating. Avoid using harsh solvents or cleaners on the coating.
Choosing the Right Polyurea for Your Needs
As a Anti Corrosion Polyurea supplier, I know that choosing the right polyurea is crucial for a successful repair. There are different types of polyurea available, each with its own set of properties and applications.
For example, Aliphatic Polyurea is known for its excellent UV resistance and non - yellowing properties. If your application is exposed to sunlight, aliphatic polyurea might be a good choice.
If you're not sure which type of polyurea is right for your repair project, feel free to reach out to me. I can help you choose the best polyurea based on your specific needs and the nature of the damage.
Conclusion
Repairing damaged anti corrosion polyurea coating doesn't have to be a complicated process. By following the steps outlined above, you can effectively repair the coating and restore its anti - corrosion properties. Remember, proper preparation, correct mixing, and careful application are key to a successful repair.
If you have any questions or need help with your polyurea repair project, or if you're interested in purchasing Anti Corrosion Polyurea, don't hesitate to contact me. I'm here to assist you every step of the way.
References
- Polyurea Coating Manufacturer's Manuals
- Industry Standards for Anti - Corrosion Coatings
- Research Papers on Polyurea Coating Repair and Maintenance


